VPS quickstart
From zero to secure server: purchase, private network access, firewall & first website.
Order your VPS
Choose a plan from Hosting plans. After successful payment, the VPS is provisioned automatically. You'll find the public IP (for DNS only) and the private IP inside your dashboard.

Private IP & secure access model
Why private IP only? – We never expose SSH to the internet. The public IP attached to your server is only for DNS A/AAAA records (websites). All remote administration goes through the private IP, which is reachable exclusively via WireGuard tunnel.
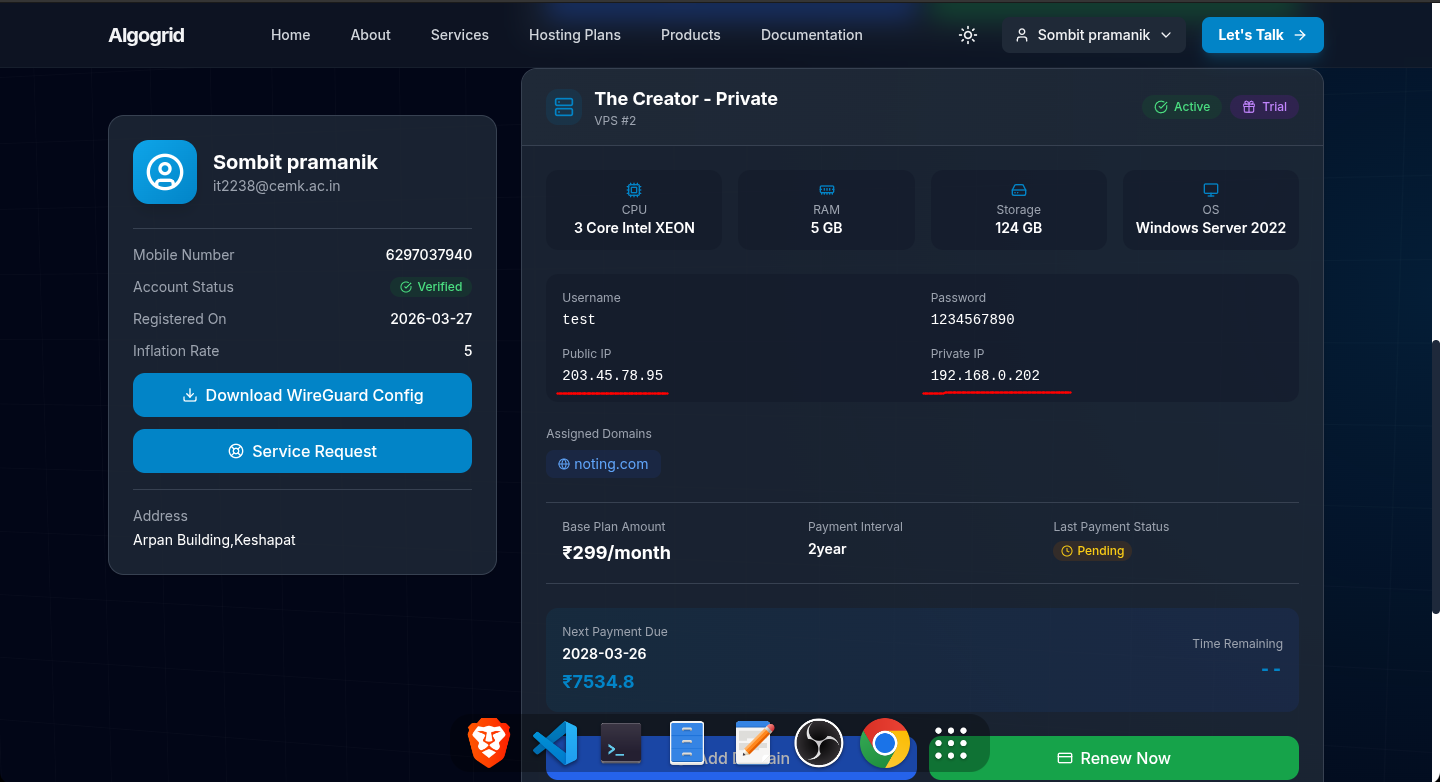
After purchase, your dashboard displays the private IP (e.g.
10.17.42.1). The public IP is listed separately – use
it only when you point a domain.
You'll locate the private IP here (see image):
WireGuard: connect to private network
We use WireGuard to create a secure tunnel. Download WireGuard for your OS:
Install the client, then import the tunnel configuration file from your dashboard.

After importing, activate the tunnel. Your machine now acts as if it's inside the private network alongside your VPS.
First SSH connection (private IP)
Open your favourite terminal: Windows Terminal, PowerShell, Git Bash, Linux terminal, or PuTTY. Then connect with:
ssh your-username@10.17.42.1 # use the private IP from dashboard
Add -o StrictHostKeyChecking=accept-new (or just
-o StrictHostKeyChecking=no for first time) to
automatically accept the fingerprint. Example:
ssh -o StrictHostKeyChecking=accept-new admin@10.17.42.1
The
default username is usually root or the one you set
during provisioning (check dashboard).
Firewall basics (UFW on Ubuntu)
After first SSH, keep your server tidy. Update the OS (Ubuntu example):
sudo apt update -y && sudo apt upgrade -y
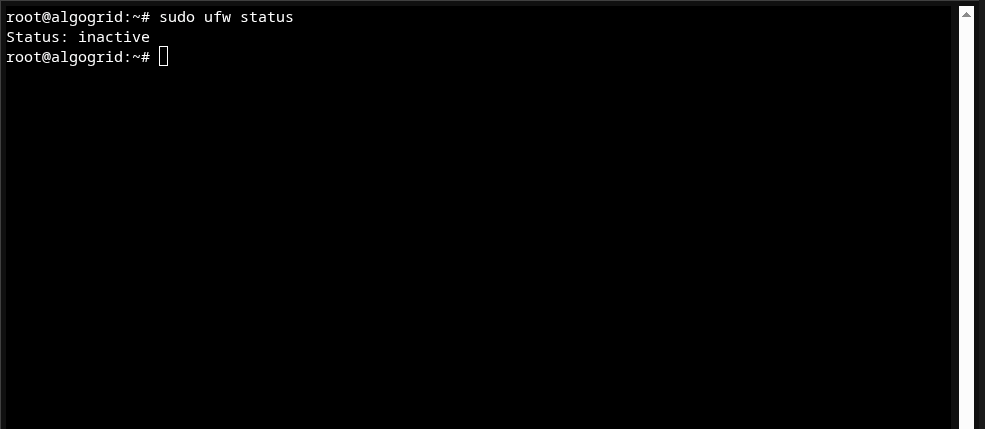
Check firewall status:
sudo ufw status
[IMAGE: ufw status showing inactive]
Allow SSH (port 22) and enable firewall:
sudo ufw allow 22/tcp
sudo ufw enable
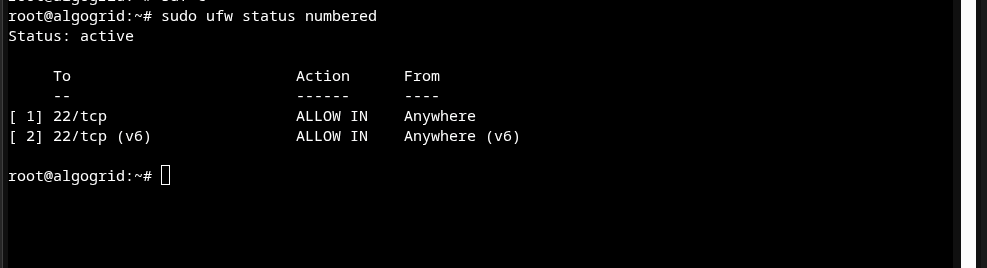
After enabling, list rules:
sudo ufw status numbered
Install software – Apache demo
You can install any package. Example with Apache on Ubuntu:
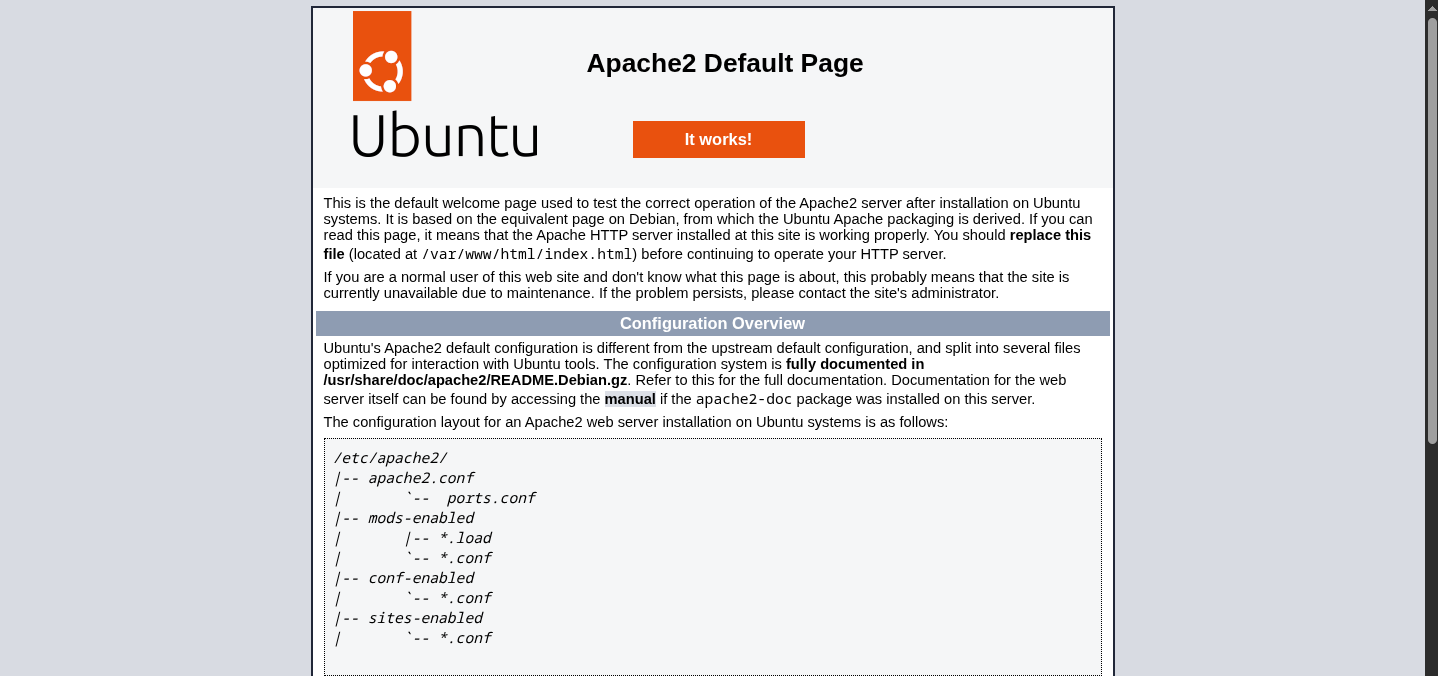
sudo apt install apache2 -y
Then allow HTTP/HTTPS in firewall:
sudo ufw allow 80/tcp
sudo ufw allow 443/tcp   # optional if you configure SSL later
Now open your browser and visit your private IP (since you are on WireGuard, private IP is reachable). You should see the Apache welcome page.
📺 Video reference: youtube.com/watch?v=mj0eT-2glis (apache on ubuntu)
Opening custom ports (e.g., Docker / WordPress)
If you run a container on port 5001, allow it similarly:
sudo ufw allow 5001/tcp
sudo ufw status
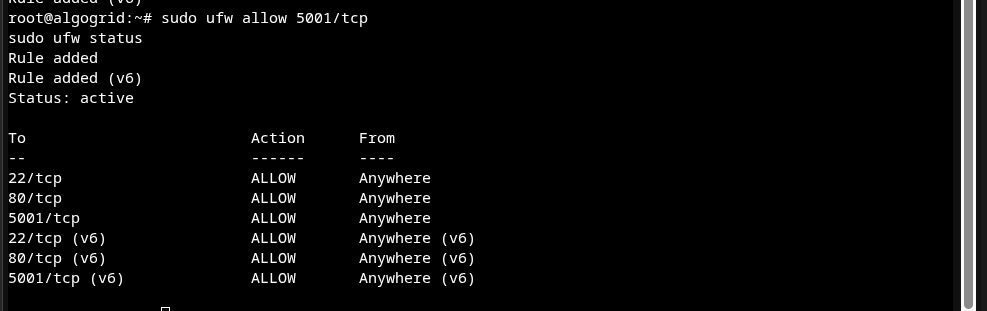
Verify with sudo ufw status or
sudo ufw show added.
Attach a domain to your VPS
To point your domain (e.g., example.com) to the server,
submit a service request from your dashboard. Two options:
You transfer domain management to us. We set records, handle subdomains after approval.
You control your own DNS, but every new subdomain needs approval via service request.
Go to Dashboard → Services → Request domain assignment (see image).
Once approved, the domain (or subdomain) is linked to your public IP. Remember: the public IP only serves web traffic; SSH stays on private IP via WireGuard.
need more details?
Our support team is available 24/7 via ticket or email.
ready to deploy?
Select a plan and get your private ultra‑secure VPS running in minutes.
compare hosting plans